Wednesday, 23 November 2011

Materials. Exterior Walls

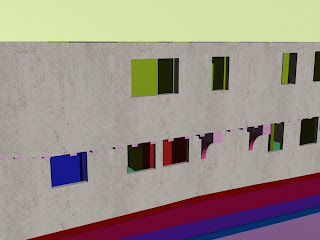
First part of animation will show the overview of Guildhall exterior. The wall will take most of the screen space so the material has to be convincing and visually appealing. The texture image is going to be used for the exterior wall. The first step was to sort out the mapping coordinates. Each wall was applied with UVW mapping modifier. The walls were applied with UV template image to see how the texture will lay down on the model and see unwanted stretching.

Every wall mapping parameters were set to the box. This worked very well making mapping uniformed.


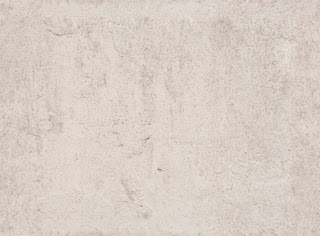
The wall material was created using image that I took during the Finchingfield trip. In the beginning I tried to apply texture as material. This gave very noticeable tiling effect. To avoid that edited the texture in Photoshop. I copied bottom and left edge of the texture. Then I flipped and rotated them. With patch tool I blended the intersections of different image parts. And here is the before and after result.


Wall material Bump map was created by desaturating the texture image and applying high pass filter.

Final result.
Modelling the Guildhall. Further progress

The roof of the guildhall was made from simple box transformed to editable poly. Roof is a low polygon model. The objects are tried to be kept with minimal count of polygons. I gets harder for computer to cope with various components in the file. Therefore, it is important to keep models as simple as possible. The texturing process is very important for these models. I believe that simple box can be turned into amazing things with the help of decent textures.


The guildhall on its own is not a sufficient enough for animation. There is need to model the surrounding area. This do not include modeling neighbouring houses and whole roads, but just connecting road and pavements. For the road and pavement I used loft modifier. The line was drawn to match the path of the road. Then the rectangular was drawn and applied as a shape for the path.

The house is further improved with poly modelling approach. Below is the stairs to the 1st floor and extruded house part that cover the stairs. For the stairs I decided to use LTypeStair and Straight Stair from geometry creation menu. This was first time i used the stair creation tool. It has enough settings to get the major part of stair. It is possible to set number of stairs and the length and height and even add handrail.


Some The stair inside the house were changed to editable poly to make final adjustments. The stairs below originally are straight stairs. The stairs had to twist at the bottom. So when in editable poly mode i selected vertices at the bottom and aligned them at one point. Then vertices of the other end were moved to finish the twist.


Modelling the Guildhall. Wooden beams

There are loads of wooden beams supporting the Guildhall walls and ceiling. At this point I created the beams that are between ground and 1st floor. The first beam was created using box. It was important to take into account that beams are not placed in perfect horizontal position. The wooden beams are slightly rotated down for one side of the building because of the back wall. Therefore, the pivot point of the box was changed to furthest point of the beam. Then the beam was copied multiple times and new beams were moved to match architecture plans. Then the beams were rotated individually to match the reference image of the back side of the building. All beams were grouped together. The future step is to create vertical wall beams and beams for the 1st floor.


The next step was to create decoration/support for the beams sticking outside the building. The support started from the primitive box. I have decided to use boolean subtract operation to get a nice curve in the box. Therefore, the cylinder was created and boolean operation was carried out.


The wooden arc was made form primitive Torus with side setting 4 and slice on from 180 degrees.

Tuesday, 22 November 2011

Modelling the Guildhall walls

The initial animation idea requires the exterior walls of the Guildhall to be removed independently from the whole building. Therefore, ground and 1st floor exterior walls were modelled separately from each other and other parts of the building. The original high quality reference images could not be used in a 3D max environment as a texture. The images would not show up in viewports. Therefore, the reference architecture plan images were re-sized in the Adobe Photoshop. The new images were much smaller than original and showed up in viewports as reference planes texture. However, reference image would not show up on the plane when changed. I did not want to loose any detail in the architecture plans by re-sizing them again. The problem was solved by saving the file and opening it again. Once the images were set up modelling took place. The walls started with the basic box. The box was transformed to the editable poly. The elements and vertices were moved to match the reference image. The wall polygon was kept as simple as possible. The wall was extended by extruding side polygons. The length of new polygons were determined by window placement in the reference images. Each window or door (as for other walls) was covered by one polygon group. The reason is creation of holes for windows and the doors. Holes have been created by selecting outside and inside wall polygons and insetting them. Then the vertices were moved to match place of the window. Then the polygons were deleted where they covered the window. The last step was done in border sub-object level. The borders around polygons were selected and connected with the bridge tool. The following method was used to create holes for all doors and windows in every wall.


As the time passed I managed to finish creating the exterior walls. The Guildhall walls consist of separate models of different ground and 1st floor sides. The animation is going to show present and future state of the building. Therefore each wall had to be created two times. Accordingly two layers were created before modelling. One is used for models of present state and other for future state. This allow to keep everything organised and avoid confusion when file is filled with more models. The inside walls were created using same method as for exterior walls. The Guildhall started to get shape after long hours of modelling using reference images.


There is a brick cover at the bottom of the Guildhall. It was created by selecting polygons of the existing exterior wall and shift dragging them to create new object. Then polygons of new object were extruded. After little adjustments the brick cover was finished. The wooden beam above brick cover was created as new box and then edited in editable polygon mode.

Sunday, 6 November 2011

Idea

Idea for the Finchingfield Guildhall project:

The main focus is going to be based on the Finchingfield Guildhall. The indented outcome of the video will be to show the Guildhall at its present and future stage after the restoration. The visualization will start by showing 360 degree outside view of the Guildhall. Then Guildhall wall of the road side is going to be removed to uncover the inside building structure. This should look like a “dollhouse”. Then each room is presented empty without any furniture. Each empty room is going to fade out to same room with restoration work done. The restored rooms are going to be filled with furniture. The history of Guildhall could also be incorporated as various artifacts in the building or as titles describing the history.

Initial reflection on group project

The second part of the module consists of the group project. We are expected to form groups of 3-4 students. In the group we are suppose to create an animation of the Finchingfield Guildhall using 3D Studio Max 2011 software. The choice is between animating how the building was utilised in the past or how it is going to be used after the reconstruction works. This part of the module does not have specification on which modelling or animation technique we have to use. Therefore, this gives a lot of freedom, which gives space for our own creative ideas. It will be interesting to see the final results which as I expect will be quite different nevertheless the fact that all groups are going to construct the same building. The task looks complicated so working in groups should let us cope with the work load. It appears that the task itself will be challenging and there will be enough space for improving my modelling and animation skills.